That craving hits, doesn’t it? That irresistible desire for a spoonful of cold, creamy, melt-in-your-mouth ice cream. While the freezer aisle offers endless options, there’s a unique satisfaction – and superior flavor – that comes from crafting your own homemade ice cream. Forget the long list of unfamiliar ingredients and embrace the simple joy of creating a frozen treat tailored exactly to your taste.
Making homemade ice cream might seem like a task reserved for culinary experts, but we’re here to tell you it’s surprisingly accessible. Whether you have a fancy ice cream maker or not, this ultimate guide will walk you through every step, from understanding the basics to mastering delicious flavor combinations. Get ready to churn out (or simply freeze!) the creamiest, most delightful ice cream you’ve ever tasted.
What You’ll Learn in This Guide:
- The fundamental ingredients that make ice cream, well, ice cream.
- The difference between churned and no-churn methods and which is right for you.
- Easy-to-follow, step-by-step instructions for making both churned and no-churn homemade ice cream.
- Essential tips and tricks to achieve the perfect creamy texture and avoid common pitfalls.
- Inspiring ideas for flavor variations to unleash your inner ice cream artisan.
- Best practices for storing your homemade ice cream so it stays delicious.
So, grab your ingredients and let’s dive into the wonderful world of homemade ice cream!
II. Understanding the Basics of Homemade Ice Cream
At its core, ice cream is a delightful emulsion of a few key components:
- Dairy: This provides the creamy base. Common choices include milk (whole milk is often preferred for richness), heavy cream (essential for a smooth texture), and sometimes half-and-half.1 The fat content significantly impacts the final texture – higher fat generally means creamier ice cream.2
- Sweeteners: Sugar not only adds sweetness but also lowers the freezing point of the mixture, preventing it from becoming a solid block of ice.3 Granulated sugar is standard, but caster sugar dissolves more easily. Some recipes also incorporate corn syrup for a smoother texture or alternative sweeteners for dietary needs.4
- Air: This is a crucial, often overlooked ingredient! During churning (in an ice cream maker), air is incorporated into the mixture, creating the light and airy texture we associate with ice cream.5 No-churn methods rely on whipping air into one of the base ingredients.
- Flavorings: This is where your creativity shines! Vanilla extract is a classic, but the possibilities are endless – fresh fruits, melted chocolate, extracts, spices, nuts, candies, and more.
- Eggs (Optional): Some traditional, custard-based ice cream recipes include egg yolks.6 These add richness, stability, and a slightly different texture. They require a cooking step to pasteurize the eggs.
Churned vs. No-Churn Ice Cream: The Key Difference
The main distinction lies in how air is incorporated into the ice cream base:
- Churned Ice Cream: This method utilizes an ice cream maker.7 The machine’s paddle constantly stirs the chilled ice cream base while it freezes. This process breaks up ice crystals and incorporates air, resulting in a smooth, light, and airy texture.8
- Pros: Classic ice cream texture, often smoother and less icy.
- Cons: Requires an ice cream maker.
- No-Churn Ice Cream: This incredibly simple method relies on whipping air into heavy cream before folding in condensed milk and flavorings. The high fat content of the whipped cream helps create a relatively smooth texture without the need for churning.
- Pros: No special equipment needed, quick and easy to prepare.
- Cons: Can sometimes be slightly denser than churned ice cream, texture might vary depending on the recipe.
Essential Equipment (and Alternatives)
- For Churned Ice Cream:
- Ice Cream Maker: Various types exist, from freezer bowl models (require pre-freezing the bowl) to compressor models (have their own freezing unit).9
- For No-Churn Ice Cream:
- Large Mixing Bowls: For whipping cream and mixing ingredients.
- Electric Mixer (Handheld or Stand Mixer): Essential for efficiently whipping the heavy cream. A sturdy whisk can work in a pinch but requires significant effort.
- Loaf Pan or Freezer-Safe Container: For freezing the ice cream.
- Other Useful Tools:
- Measuring Cups and Spoons: Accurate measurements are important for the right texture and flavor.
- Spatula or Rubber Scraper: For mixing and folding ingredients.
III. Step-by-Step Guide: No-Churn Homemade Ice Cream
This method is perfect for beginners and anyone without an ice cream maker!

- Yields: Approximately 1 quart
- Prep Time: 15 minutes
- Freeze Time: At least 6 hours (preferably overnight)
Ingredients:
- 2 cups (480ml) heavy cream, cold
- 1 (14 ounce) can (397g) sweetened condensed milk10
- 1 teaspoon vanilla extract (or other flavoring of your choice)
- Optional mix-ins: ½ cup chocolate chips, chopped cookies, fruit pieces, etc.
Instructions:
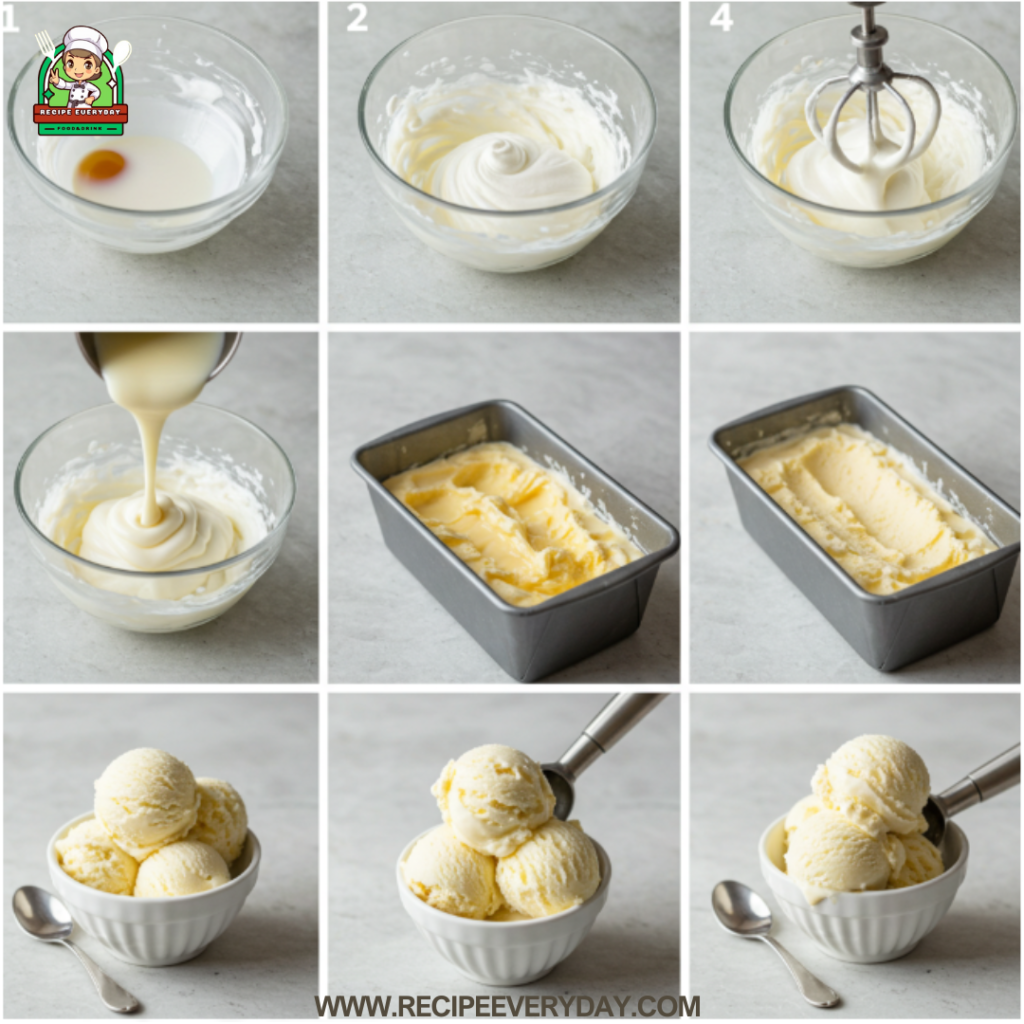
- Chill Your Bowl: Place your mixing bowl in the freezer for at least 15-20 minutes. A cold bowl helps the heavy cream whip properly.
- Whip the Heavy Cream: Pour the cold heavy cream into the chilled bowl. Using an electric mixer (or whisk), beat the cream on medium-high speed until stiff peaks form. This means the cream holds its shape when the beaters are lifted. Be careful not to over-whip, which can turn the cream grainy.
- Add Condensed Milk and Flavoring: Gently fold in the sweetened condensed milk and vanilla extract (or your chosen flavoring) into the whipped cream using a spatula. Fold until just combined; avoid overmixing, which can deflate the whipped cream.
- Incorporate Mix-Ins (Optional): If using any mix-ins, gently fold them into the ice cream base until evenly distributed.
- Transfer to Freezer-Safe Container: Pour the ice cream mixture into a loaf pan or another freezer-safe container with a tight-fitting lid.
- Cover and Freeze: Cover the container tightly with plastic wrap (pressing it directly onto the surface of the ice cream to help prevent ice crystals) and then place the lid on.11 Freeze for at least 6 hours, or preferably overnight, until solid.
- Serve and Enjoy: Before serving, let the ice cream sit at room temperature for 5-10 minutes to soften slightly for easier scooping.12
Serving Suggestions: Enjoy your no-churn homemade ice cream on its own, with your favorite toppings, in a cone, or alongside desserts.
IV. Step-by-Step Guide: Churned Homemade Ice Cream (Basic Vanilla Recipe)
This recipe uses an ice cream maker for a classic ice cream texture. Always refer to your ice cream maker’s specific instructions.

- Yields: Approximately 1 quart
- Prep Time: 20 minutes (plus chilling time)
- Churning Time: Varies by ice cream maker (usually 20-40 minutes)
- Ripening Time: At least 2 hours
Ingredients:
- 1 cup (240ml) whole milk
- ¾ cup (150g) granulated sugar
- 2 cups (480ml) heavy cream
- 1 tablespoon vanilla extract
- Pinch of salt
Instructions:
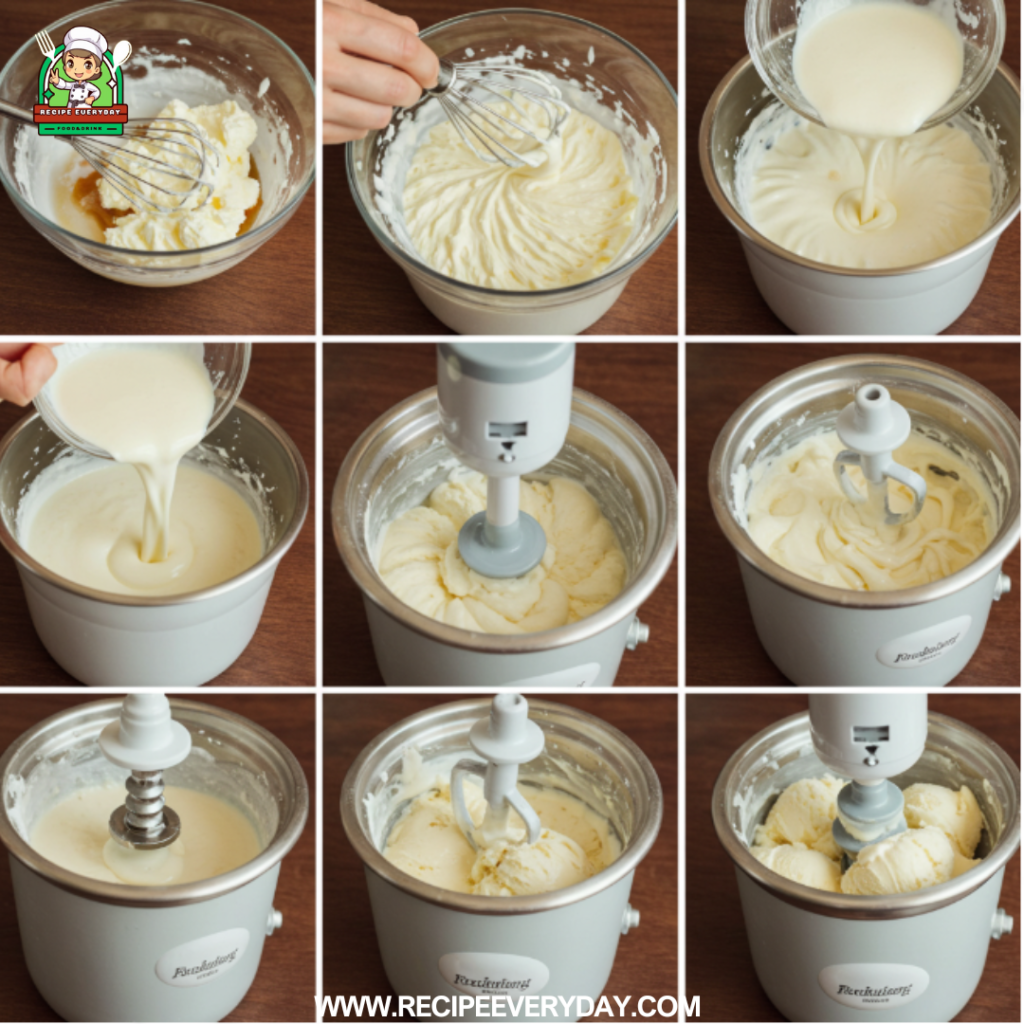
- Combine Milk and Sugar: In a medium saucepan, whisk together the whole milk and sugar over medium heat until the sugar is completely dissolved. Do not boil. Remove from heat.
- Stir in Cream, Vanilla, and Salt: Pour the milk-sugar mixture into a bowl. Stir in the heavy cream, vanilla extract, and salt.
- Chill the Base: Cover the bowl with plastic wrap and refrigerate for at least 4 hours, or preferably overnight. This crucial step ensures the base is thoroughly chilled, which is essential for proper churning and a smooth texture.
- Prepare Your Ice Cream Maker: Follow the manufacturer’s instructions for your specific ice cream maker. This usually involves freezing the bowl for several hours beforehand.
- Churn the Ice Cream: Once the base is thoroughly chilled and your ice cream maker is ready, pour the ice cream base into the frozen bowl. Churn according to your machine’s instructions, typically for 20-40 minutes, or until the mixture has thickened to a soft-serve consistency.
- Add Mix-Ins (Optional): If you’re adding any mix-ins (like chocolate chips or fruit), do so during the last few minutes of churning.13
- Transfer to Freezer-Safe Container: Scoop the soft-serve ice cream into a freezer-safe container with a tight-fitting lid.
- “Ripen” in the Freezer: Cover the container tightly and freeze for at least 2 hours for the ice cream to firm up to a scoopable consistency. This “ripening” period allows the flavors to meld and the texture to fully develop.
- Serve and Enjoy: Scoop and enjoy your classic homemade ice cream!
V. Tips and Tricks for Perfect Homemade Ice Cream
- Chill Everything Thoroughly: This cannot be stressed enough! Cold ingredients and a cold ice cream maker bowl are key to preventing large ice crystals and achieving a smooth texture.
- Don’t Over-Churn (Churned Method): Churn until the ice cream reaches a thick, soft-serve consistency. Over-churning can result in a grainy or buttery texture.
- Proper Freezing is Crucial: Use shallow, airtight containers to freeze your ice cream quickly and evenly. Press plastic wrap directly onto the surface before sealing to minimize air exposure and ice crystal formation.
- Boost Flavor Intensity: Use high-quality flavor extracts and fresh, ripe ingredients. For fruit flavors, consider roasting or lightly cooking the fruit to intensify its sweetness and flavor.
- Mastering Mix-Ins: For even distribution, add mix-ins during the last few minutes of churning (for churned ice cream) or gently fold them in after whipping the cream (for no-churn).14 Chop larger mix-ins into smaller pieces.
- Troubleshooting Common Issues:
- Icy Texture: Usually caused by not chilling the base properly, slow freezing, or too much water content. Ensure thorough chilling, freeze quickly, and avoid adding too much liquid (like unfrozen fruit puree).
- Too Hard Ice Cream: Can result from too much sugar or freezing for too long at a very low temperature. Let it sit at room temperature for a few minutes before scooping.
- Too Soft Ice Cream: Might indicate not enough fat, not chilling properly, or not churning long enough.
- Separation: Can occur if the base wasn’t properly emulsified or if there was a significant temperature fluctuation during freezing.
VI. Flavor Variations and Ideas
The beauty of homemade ice cream lies in its endless possibilities! Here are some ideas to get your creative juices flowing:
- Classic Reinventions:
- Double Chocolate: Use dark cocoa powder and chocolate chunks.
- Strawberry Cheesecake: Blend in cream cheese and swirl in strawberry jam.
- Mint Chocolate Chip: Use mint extract and add mini chocolate chips.15
- Fruity Delights:
- Peach Cobbler: Incorporate roasted peaches and crumbled graham crackers.
- Raspberry Ripple: Swirl in a homemade raspberry sauce.
- Mango Sorbet (Dairy-Free): Explore dairy-free options using fruit purees.
- Rich & Decadent Indulgences:
- Cookies and Cream: Fold in crushed Oreo cookies or your favorite sandwich cookies.
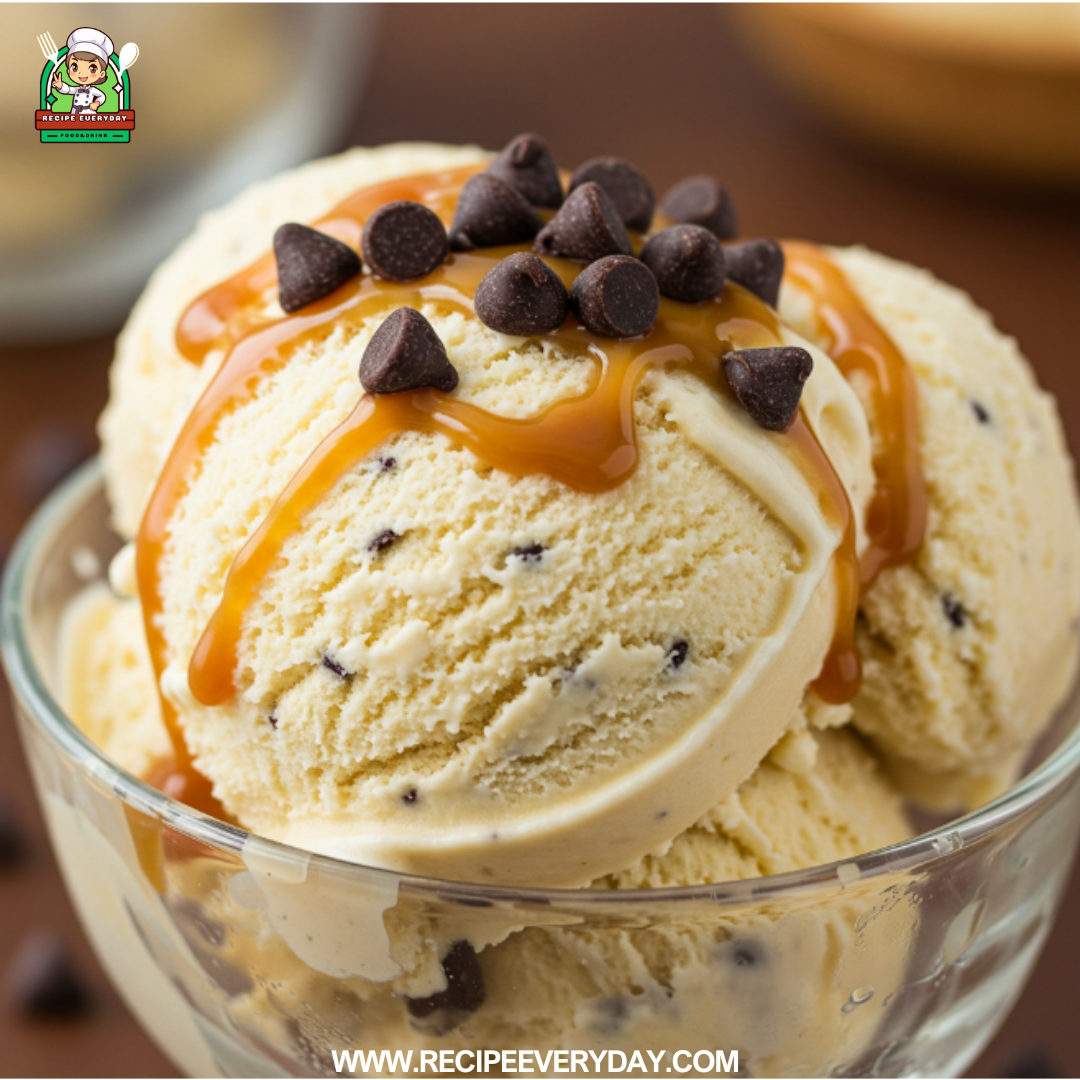
- Salted Caramel: Swirl in homemade salted caramel sauce.
- Coffee Toffee: Infuse the base with coffee and add crunchy toffee bits.
- Unique & Adventurous Tastes:
- Lavender Honey: Infuse the milk with dried lavender and use honey as a sweetener.
- Brown Butter Pecan: Use browned butter in the base and add toasted pecans.16
- Spicy Chocolate: Add a pinch of cayenne pepper to your chocolate ice cream.17
Don’t be afraid to experiment with your favorite flavors and ingredients!
VII. Storing Homemade Ice Cream
Proper storage is key to maintaining the quality of your homemade ice cream:
- Airtight Containers: Transfer your ice cream to freezer-safe containers with tight-fitting lids.18 This minimizes air exposure and helps prevent freezer burn and the absorption of other freezer odors.
- Press Plastic Wrap: As mentioned earlier, pressing a layer of plastic wrap directly onto the surface of the ice cream before sealing the container can help prevent ice crystals.19
- Recommended Storage Time: Homemade ice cream is best enjoyed within 1-2 weeks. While it won’t necessarily spoil after that, the texture and flavor may start to deteriorate.
- Scooping Tips: If your ice cream is very hard, let it sit at room temperature for 5-10 minutes before scooping. Dipping your ice cream scoop in warm water can also make scooping easier.20
VIII. Conclusion
Congratulations! You’re now equipped with the knowledge to embark on your homemade ice cream making journey. From understanding the basics to mastering both churned and no-churn methods, you can confidently create delicious and personalized frozen treats in your own kitchen.
The satisfaction of serving a scoop of your own homemade ice cream, bursting with fresh flavors and a creamy texture you control, is truly rewarding. So, don’t wait for a special occasion. Grab your ingredients, follow these steps, and get ready to experience the pure joy of homemade ice cream.
Now it’s your turn! What are your favorite ice cream flavors? Share your thoughts and questions in the comments below! And if you found this guide helpful, be sure to share it with your fellow ice cream lovers!
Stay updated on our latest ice cream creations – follow us on Facebook!
Looking for tips on storing other homemade goodies? Read our article
Smoothie Bowls: Your Vibrant, Healthy, and Customizable Breakfast (or Anytime!)

